
The Path & Location Integration Tasks
This page last updated 2020/08/20
Description
The Path Integration Task was based off the real-world task used by Jan Wiener and colleagues (2011). This task is designed to assess the ability to integrate optic flow into a coherent sense of movement, and update and store that representation for future use. Participants are asked to carefully pay attention as they are automatically moved through the environment, and are subsequently asked to return to the location they were at before the automatic movement started. As implemented on gettinglost.ca, this task also includes the 'Location Integration Task', detailed below. Both tasks are set in an empty desert-like virtual environment, without any clear proximal or distal landmarks.
Both tasks have the camera set at a height of 1.75 virtual units, with a 15° nose-down pitch. The average translation speed is 1.5 units/second, and the average rotation speed is 30 °/second. Both the translation and rotation speeds are randomly varied by up to 12.5% about their average value at an arm-by-arm basis.
Path Integration in-task instructions
At each trial in this task, the camera will automatically move forward, make a turn, then move forward some more in this empty environment. After this movement, you are tasked with directly returning to the point the trial started. To do this, you will need to carefully pay attention to the movement and turns made automatically.
After the automatic movement, use the left and right arrows (or the 'a' and 'd' keys) to face the position from which the automatic movement was started. Once you are finished turning, press ENTER. You may now move forwards using the up arrow (or 'w' key), try to stop on the same place the trial began. Again, when you are finished moving, press ENTER. This will complete the trial. There will be a total of 16 trials.
Path Integration stimuli
The 16 unique trial types (0-15) used in the default implementation of the Path Integration Task are depicted below. At each trial, the camera begins at the location indicated by the brighter red marker at the bottom center of each panel below. The camera automatically translates to the darker red marker, rotates to one of the numbered locations, and finally translates to the numbered location. At this point, the participant would be prompted to respond.

Path Integration Trial Types 0-7

Path Integration Trial Types 8-15
| Path Integration Trial Data | ||||||
|---|---|---|---|---|---|---|
| Translation magnitude | Turn angles | |||||
| Trial Type | Arm 1 | Arm 2 | Return | Outbound | Return | |
| 0 | 4 | 5.657 | 4.000 | -135° | -135° | |
| 1 | 4 | 4.000 | 5.657 | -90° | -135° | |
| 2 | 4 | 2.828 | 2.828 | -135° | -90° | |
| 3 | 4 | 2.828 | 6.325 | -45° | -153° | |
| 4 | 4 | 5.657 | 4.000 | 135° | 135° | |
| 5 | 4 | 4.000 | 5.657 | 90° | 135° | |
| 6 | 4 | 2.828 | 2.828 | 135° | 90° | |
| 7 | 4 | 2.828 | 6.325 | 45° | 153° | |
| 8 | 8 | 8.944 | 4.000 | -153° | -117° | |
| 9 | 8 | 5.657 | 5.657 | -135° | -90° | |
| 10 | 8 | 6.325 | 2.828 | -162° | -63° | |
| 11 | 8 | 2.828 | 6.325 | -135° | -63° | |
| 12 | 8 | 8.944 | 4.000 | 153° | 117° | |
| 13 | 8 | 5.657 | 5.657 | 135° | 90° | |
| 14 | 8 | 6.325 | 2.828 | 162° | 63° | |
| 15 | 8 | 2.828 | 6.325 | 135° | 63° | |
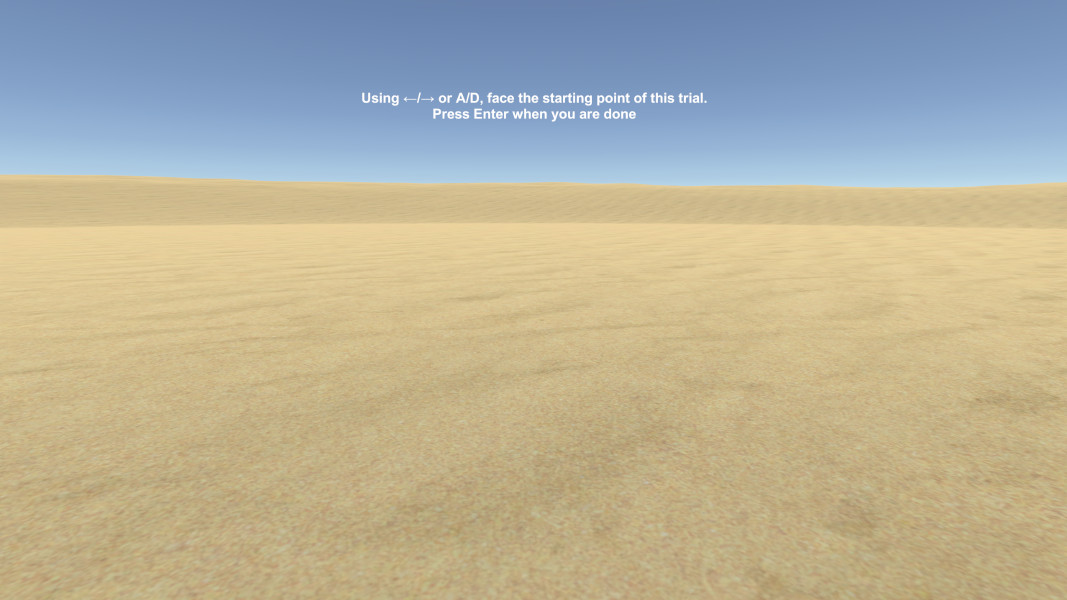
Path Integration Task sample response phase
Path Integration Task response phase
In this phase of the Path Integration Task, the participant will be prompted to rotate to face the starting point of the trial, i.e. attempt to produce the 'return angle' in the Path Integration Trial Data table. Once they press enter to commit to their heading, they will be prompted to move straight forward to attempt to stand upon the starting point, i.e. reproducing the 'return distance' in the Path Integration Trial Data table.
Location Integration in-task instructions
In this task, you will be required to remember and move to the location of an object in an environment. At each trial, the camera will turn to look at a traffic cone, pause, then turn back to where it started. The screen will fade to black and the cone will disappear. The scene will then fade in, with the camera facing the same direction, and you will be asked to use the left and right arrows (or the 'a' and 'd' keys) to face the position you saw the cone. Once you are finished turning, press ENTER. You will now be asked to move to the location you last saw the cone using the up arrow (or 'w' key). Again, when you are finished moving, press ENTER. This will complete the trial. There will be a total of 12 trials.
Location Integration stimuli
The 12 unique trial types (0-11) used in the default implementation of the Location Integration Task are shown below. At each trial, the camera begins at the location indicated by the red marker at the center of the panel below. The target object (a traffic cone / pylon) appears at one of the numbered locations. The camera automatically rotates to face it, pauses, and returns to it's original heading. The screen fades out, and the target object disappears. At this point, the participant would be prompted to respond; first by rotating to face the location they last saw the cone, and subsequently translating to stand on the last place they saw the cone (i.e., reproducing the 'Turn Angle' and 'Translation Magnitude', respectively).

Location Integration Trial Types
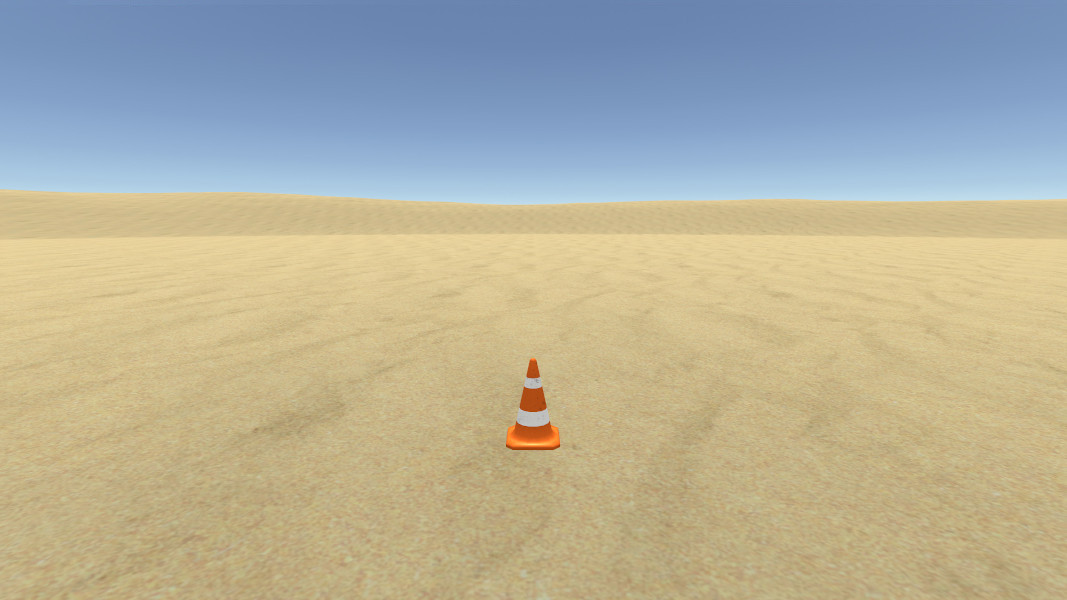
Location Integration Task sample stimulus
| Location Integration Trial Data Table | ||
|---|---|---|
| Trial Type | Translation magnitude | Turn angle |
| 0 | 5.657 | -45° |
| 1 | 4.000 | -90° |
| 2 | 5.657 | -135° |
| 3 | 2.828 | -45° |
| 4 | 2.828 | -135° |
| 5 | 4.000 | 0° |
| 6 | 4.000 | 180° |
| 7 | 2.828 | 45° |
| 8 | 2.828 | 135° |
| 9 | 5.657 | 45° |
| 10 | 4.000 | 90° |
| 11 | 5.657 | 135° |
Path & Location Integration Task Output
For both the Location & Path Integration Tasks, the trial order as well as the angular and distance errors will be output for each participant. Angular errors are reported in degrees, with positive values representing errors in the clockwise direction. For instance, on Location Integration trial type '0', if the participant turned counter-clockwise 40°, bringing them 5° short of the ideal response, their error would be reported as +5, as their angular error was 5° clockwise relative to the ideal path. Distance errors are calcuated by subtracting the ideal translation magnitude from the performed translation magnitude, in milliunits. For these data, positive values represent overshoots and negative values represent undershoots.
Change log
2020/08/19: Added AppType variable to distinguish WebGL from Standalone.
2020/08/10: Added more verbose reporting: now includes initial rotation direction in both the PINT and LINT. Changed arrows in instructions for WebGL compatability, more rapid fades and LINT cone movement.
2020/05/21: V1.08. Improved instructions.
2020/02/24: V1.07. Moved translation prompt to be in a different position than rotation prompt.
2019/08/08: V1.06. Removed pointing arrow, some participants found it confusing.
2019/05/24: V1.05. Minor performance improvements. Made task brighter. Changed text appearance. Increased speed of fades.
2018/03/31: V1.04. Fixed issue where cursor appeared at instructions screen at second task. Fixed instructions fading.
2017/08/08: V1.03. Removed additional trials, integrated with gettinglost.ca. Increased tranlation and rotation speed. Shortened fades and refractory period. Changed text appearance, added antialiasing and distance blur.
2015/12/05: V1.02. Included repeated trials, a total of 20 for PI, 15 for LI. Added response refracatory periods.